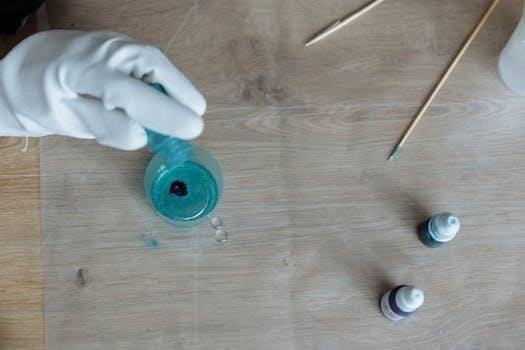
Eye Candy pigments are a fantastic choice for coloring epoxy resin projects, offering a wide variety of vibrant colors and metallic effects. These pigments, often in powder form, suspend within the resin, creating stunning visual results. They are perfect for use in river tables, inlays and various other projects.
What are Eye Candy Pigments?
Eye Candy pigments are specialized colorants, primarily available in powder form, designed to impart vibrant and unique visual effects to epoxy resin and various other mediums. These pigments are not dyes that dissolve into the resin; instead, they are finely ground particles that suspend within the resin, creating a shimmering, metallic, or pearlescent appearance. They are often made from mica and are known for their high quality and ability to produce long-lasting shine in resin projects. Eye Candy pigments come in a wide array of colors, including various shades of metallic, neon, and pearlescent, allowing artists to achieve different creative visions. These pigments are incredibly versatile, suitable for diverse applications, such as resin art, woodworking, nail polish, bath bombs, and even automotive paint. Their ability to disperse evenly within the resin ensures a consistent and captivating finish. They are available in a range of particle sizes, each contributing to the final look, from a subtle shimmer to a bold, reflective effect. Eye Candy pigments are a great tool for enhancing the aesthetic appeal of resin art.
Types of Eye Candy Pigments
Eye Candy pigments are available in various types, each offering distinct visual characteristics when mixed with epoxy resin. Metallic pigments, a popular choice, provide a shiny, reflective finish, mimicking the appearance of actual metals like gold, silver, or copper. These create a luxurious and sophisticated effect in resin projects. Pearlescent pigments, on the other hand, produce a subtle, shimmering effect, adding a soft and elegant touch to the resin. These pigments often display a multi-dimensional quality, shifting color slightly depending on the viewing angle. Neon pigments are another type, known for their vibrant and intense colors, perfect for creating bold and eye-catching pieces. These pigments can add a playful and energetic feel to resin art. There are also color-shifting pigments, which change color depending on the angle of light, resulting in a dynamic and captivating finish. Furthermore, some Eye Candy pigments come with larger particle sizes, like the “Icicle” type, which create a more textured and sparkling effect. The choice among these types of pigments depends on the desired aesthetic for the resin project.

Preparing for Epoxy Resin Mixing
Before mixing epoxy resin with Eye Candy pigments, it’s crucial to prepare properly. This involves gathering necessary materials, ensuring a clean workspace, and understanding safety precautions. Proper preparation is key to successful resin projects.
Essential Safety Precautions
Working with epoxy resin and Eye Candy pigments requires strict adherence to safety protocols. Always begin by ensuring your workspace is well-ventilated to avoid inhaling fumes, as epoxy resin can release volatile organic compounds. Wearing a respirator is highly recommended to protect your respiratory system from these harmful vapors. Skin contact with resin and hardener can cause irritation or allergic reactions, so it’s essential to wear gloves throughout the entire process. Protect your eyes with safety glasses or goggles to prevent accidental splashes from entering your eyes. Avoid eating, drinking, or smoking while working with resin, and maintain a clean workspace to minimize the risk of contamination. If resin comes into contact with your skin, wash immediately with soap and water. If irritation persists, seek medical attention. Always read and understand the manufacturer’s safety data sheets (SDS) for both the resin and the pigments you are using. Properly dispose of all used materials and containers in accordance with local regulations. By taking these precautions, you’ll ensure a safer and more enjoyable creative experience.
Measuring Epoxy Resin and Hardener
Accurate measurement of epoxy resin and hardener is paramount for a successful outcome when working with Eye Candy pigments. Always refer to the specific manufacturer’s instructions for the correct mixing ratio; this is usually a two-part system, and the ratios can vary. Using measuring cups or graduated containers, carefully pour the specified amount of resin into a clean mixing container. Next, measure and pour the corresponding amount of hardener into the same container. Ensure the measurements are precise; an incorrect ratio can result in the resin not curing properly, leading to a sticky or brittle finish. Avoid estimating measurements, as this can compromise the final results of your project. The accuracy in this step is crucial to the chemical reaction required for the resin to harden correctly. Double-check your measurements before mixing, and take extra care to avoid cross-contamination of resin and hardener containers. Proper measuring ensures the resin will cure to its optimal hardness and clarity and creates a suitable base for the Eye Candy pigments.

Mixing Eye Candy Pigments with Epoxy Resin
Once the resin and hardener are combined, it’s time to introduce the Eye Candy pigments. This step requires careful addition and thorough mixing to achieve an even color distribution and desired effect.
Adding Pigment to Resin
The process of adding Eye Candy pigments to epoxy resin is crucial for achieving the desired aesthetic in your project. After thoroughly mixing the resin and hardener, begin by gradually introducing the pigment. A common ratio is about 2 grams of pigment for every 8 ounces (230ml) of epoxy resin, but this can be adjusted to achieve the desired color saturation. It’s better to start with less pigment and add more until the desired intensity is achieved, as it’s much easier to add pigment than remove it. Begin by adding a small amount of pigment to the epoxy mixture. Using a mixing stick, gently stir the pigment into the resin. It’s important to ensure that the pigment is evenly dispersed throughout the resin. Make sure there are no clumps of pigment, as this can lead to uneven color distribution in the final product. Continue mixing for a few minutes to ensure complete integration of the pigment. The mixing process should be thorough but gentle to avoid introducing air bubbles. Once the pigment is fully mixed, you can proceed with your project, whether it’s pouring into molds or onto a surface. Remember to follow the manufacturer’s instructions for both the epoxy resin and pigments.
Achieving Desired Color Effects
Achieving the desired color effects with Eye Candy pigments in epoxy resin involves careful consideration of pigment quantity and mixing techniques. For a subtle, shimmering effect, use a smaller amount of pigment, allowing the resin’s clarity to shine through. If you desire a more opaque and vibrant color, gradually increase the pigment until you reach your target intensity. When using multiple colors, consider pouring them separately, or blending them carefully to create unique swirls and patterns. Layering colors is also a fantastic approach, pouring different shades on top of each other, allowing for beautiful depth in the final piece. Experimenting with different mixing methods, like a gentle stir or a more vigorous mix, can also dramatically change the effect; For a metallic finish, use pigments specifically designed for that look, ensuring they are fully suspended and not dissolved in the resin. Remember that the pigment’s behavior is influenced by the thickness of the resin layer and how it’s applied. Test small samples first to achieve the perfect color before committing to a large project, which will save you time and resources.

Application and Curing of Epoxy Resin
Once your colored resin is thoroughly mixed, carefully pour it into your mold or project area. Ensure even distribution. Allow the resin to cure completely according to manufacturer’s instructions. Proper curing is critical for a durable and beautiful finish.
Pouring the Colored Resin
After you have successfully mixed your epoxy resin and incorporated the desired Eye Candy pigments, the next crucial step is the pouring process. This stage requires care and precision to ensure the best possible outcome for your project. Before you begin, ensure your work surface is level and protected with a drop cloth or other covering. This prevents any accidental spills from causing unwanted messes or sticking to your work area. It’s also important to have your mold or project surface fully prepared and ready to receive the resin. This might include cleaning the surface or applying a mold release agent to ensure the cured resin can be easily removed.
Begin pouring the colored resin slowly and steadily. Avoid pouring from too high, as this can introduce air bubbles into the mixture. Instead, pour as close to the surface as you comfortably can. If you are working with a mold, start by pouring into the lowest areas, allowing the resin to slowly fill up the space. If you are working on a flat surface, such as a table or countertop, pour the resin in a thin, even layer, allowing it to self-level. If you are using multiple colors, pour them gradually to achieve the desired effect, whether it’s a gradient, swirl, or separate color blocks. Be sure to pour gently to avoid disturbing the already poured resin. This will ensure the different colors stay where you poured them.
Drying and Curing Instructions
Once you have poured your epoxy resin, the next vital step is allowing it to dry and cure properly. This process ensures that your project hardens fully and achieves its intended finish. The drying and curing time can vary depending on the type of epoxy resin you are using, the thickness of the pour, and the ambient temperature and humidity. Always refer to the specific manufacturer’s instructions for the most accurate guidance. Typically, epoxy resin will start to set within a few hours, but it may take several days for it to fully cure and reach its maximum hardness. During the curing period, it’s crucial to protect your project from dust, dirt, and other contaminants.
For optimal curing, keep your project in a stable environment where the temperature is consistent, usually around 70-75°F (21-24°C). Avoid placing it in direct sunlight or in areas where the temperature may fluctuate. High humidity can also affect the curing process and may lead to a cloudy or sticky finish. It is important to leave it untouched during the curing process, do not try to move or touch the resin while it is curing, otherwise it may distort. If you notice any uncured spots after the recommended time, it may indicate that the mixing ratio was incorrect or the temperature was not adequate. In this case, you may need to add a thin layer of resin to fix the problem.

Creative Uses and Projects
Eye Candy pigments offer endless possibilities for creative projects with epoxy resin. These versatile pigments can be used to create stunning river tables, unique jewelry pieces, custom tumblers, and beautiful art. The results are always vibrant and eye-catching.
Using Eye Candy Pigments in various projects
Eye Candy pigments unlock a world of creativity when used with epoxy resin, enabling a diverse range of projects. For woodworking, these pigments are perfect for creating striking river tables, where vibrant colors can mimic natural waterways or add a touch of fantasy. Inlays in wood projects gain depth and dimension with the shimmering metallic effects of Eye Candy pigments, enhancing intricate designs. Jewelry makers can use them to craft unique pendants, earrings, and rings, each piece reflecting a distinctive blend of color and shine.
The versatility extends to home decor, with custom coasters, trays, and decorative bowls becoming personalized works of art. Tumblers, too, are elevated with the addition of these pigments, allowing for custom color gradients and captivating swirls. Artists can incorporate Eye Candy pigments into paintings and sculptures, creating captivating visual textures and depth. For those interested in smaller crafts, these pigments are excellent for creating unique keychains, phone grips, and other small trinkets. The fine nature of the mica powder ensures smooth mixing with the resin, providing even color distribution and a professional finish. The possibilities are endless; from large-scale furniture to delicate accessories, Eye Candy pigments bring a unique dimension of color and shimmer to any epoxy resin project.
Troubleshooting common problems
When working with Eye Candy pigments and epoxy resin, several common issues can arise. One frequent problem is uneven color distribution. This often occurs due to insufficient mixing, so ensuring the pigment is thoroughly incorporated into the resin is crucial. Clumping of the pigment can also lead to unevenness; pre-mixing the powder with a small amount of resin before adding it to the bulk can help prevent this. Another challenge is achieving the desired color intensity. If the color appears too light, it may be necessary to add more pigment, but it is important to do this gradually to avoid oversaturation which can affect the resin’s curing process.
Sometimes, the resin might not cure properly, resulting in a sticky or soft finish. This can be due to an incorrect resin-to-hardener ratio, so it is important to meticulously follow the manufacturer’s instructions. Temperature also plays a role; low temperatures can slow down curing, while high temperatures can cause the resin to cure too quickly. Furthermore, bubbles can form in the resin, especially when mixing vigorously. Using a heat gun or a toothpick to remove the bubbles can help. Finally, some pigments can fade or shift over time, especially when exposed to sunlight; choosing UV-resistant pigments can mitigate this issue. Careful planning and attention to detail will help avoid these problems.

